Sunday, January 28, 2018

Vegas Wedding Quilt Tips & Tricks - Part 4


In this last and final Vegas Wedding quilt post, I will be sharing a few tips for assembling the quilt top! I planned to get a full shot of my top finished this weekend, but....life happened so the photo shoot didn't 👎 You all will have to pretend that graphic below is the real thing for now 😂😉 I am SO excited with how it turned out though and can't wait to get some photos and share them with you!
The Vegas Wedding Quilt pattern can be found HERE
The hardest part of assembling the top is lining up the angled seams of Blocks Two and Three with Block One. I have a tip I discovered while making my first Vegas Wedding Quilt that made it pretty much fool proof. But, first a tip for sewing Piece J....

When sewing a halved Piece J to a Block One, either finger press Piece J in half and line up the center crease with the center seam of Block One. OR you can just make sure the point on the triangle is lined up with the center seam too! Either method ensures that Piece J is centered on the block.


Alright, and now my tip for getting the angled seams of Blocks Two and Three to line up with the straight seams of Block One....Lay a Block One and Block Three, right sides together (RST) like shown in the photo below. Line up the left raw edges of both blocks. My Block Three is positioned a little lower than Block One in the photo below so you can have a better visual for how these seams will line up.

To make sure that the angled seams of Block Three line up with the straight seams of Block One, you want the point of the diagonal seam to line up with the edge of the seam it is pointing towards/needs to line up with.


An example of how these two seams will line up is below. The most important thing to pay attention to is the direction your angled seem is going. In the example below the diagonal seam, or seam that the bottom arrow is pointing at is going toward the right. So the point of that seam needs to line with the right edge of the straight seam below it or the seam that the top arrow is pointing at.


This tip will also apply to when you pin Blocks One and Block Two together. If you notice in the photo below, the angled seam on the left is going to the right, so the point of that seam will then be lined up with the right edge of the seam in Block One above it. Also, make sure the center seam of Block one is intersecting right through the center point of Block Two. I just simply fold back the center of Block One a little bit and adjust as necessary until that center seam intersects perfectly.


I like to pin as many blocks together as I can from each row before I start sewing. It really speeds it up if you chain piece as much as possible.


I also save time by not pressing the seams until each row is pieced. So after I sew the stack of blocks above, I'll lay them out on my floor, pin the units/blocks together from each row again - until the entire row is pieced, and then I will press my seams.


It helps to press the seams from each row in alternate directions so the seams nest together when you sew the rows together. For example, if the seams in Row 1 are pressed to the left then the seams in Row 2 are pressed to the right.


Here are all of my rows finished and ready to be sewn together...


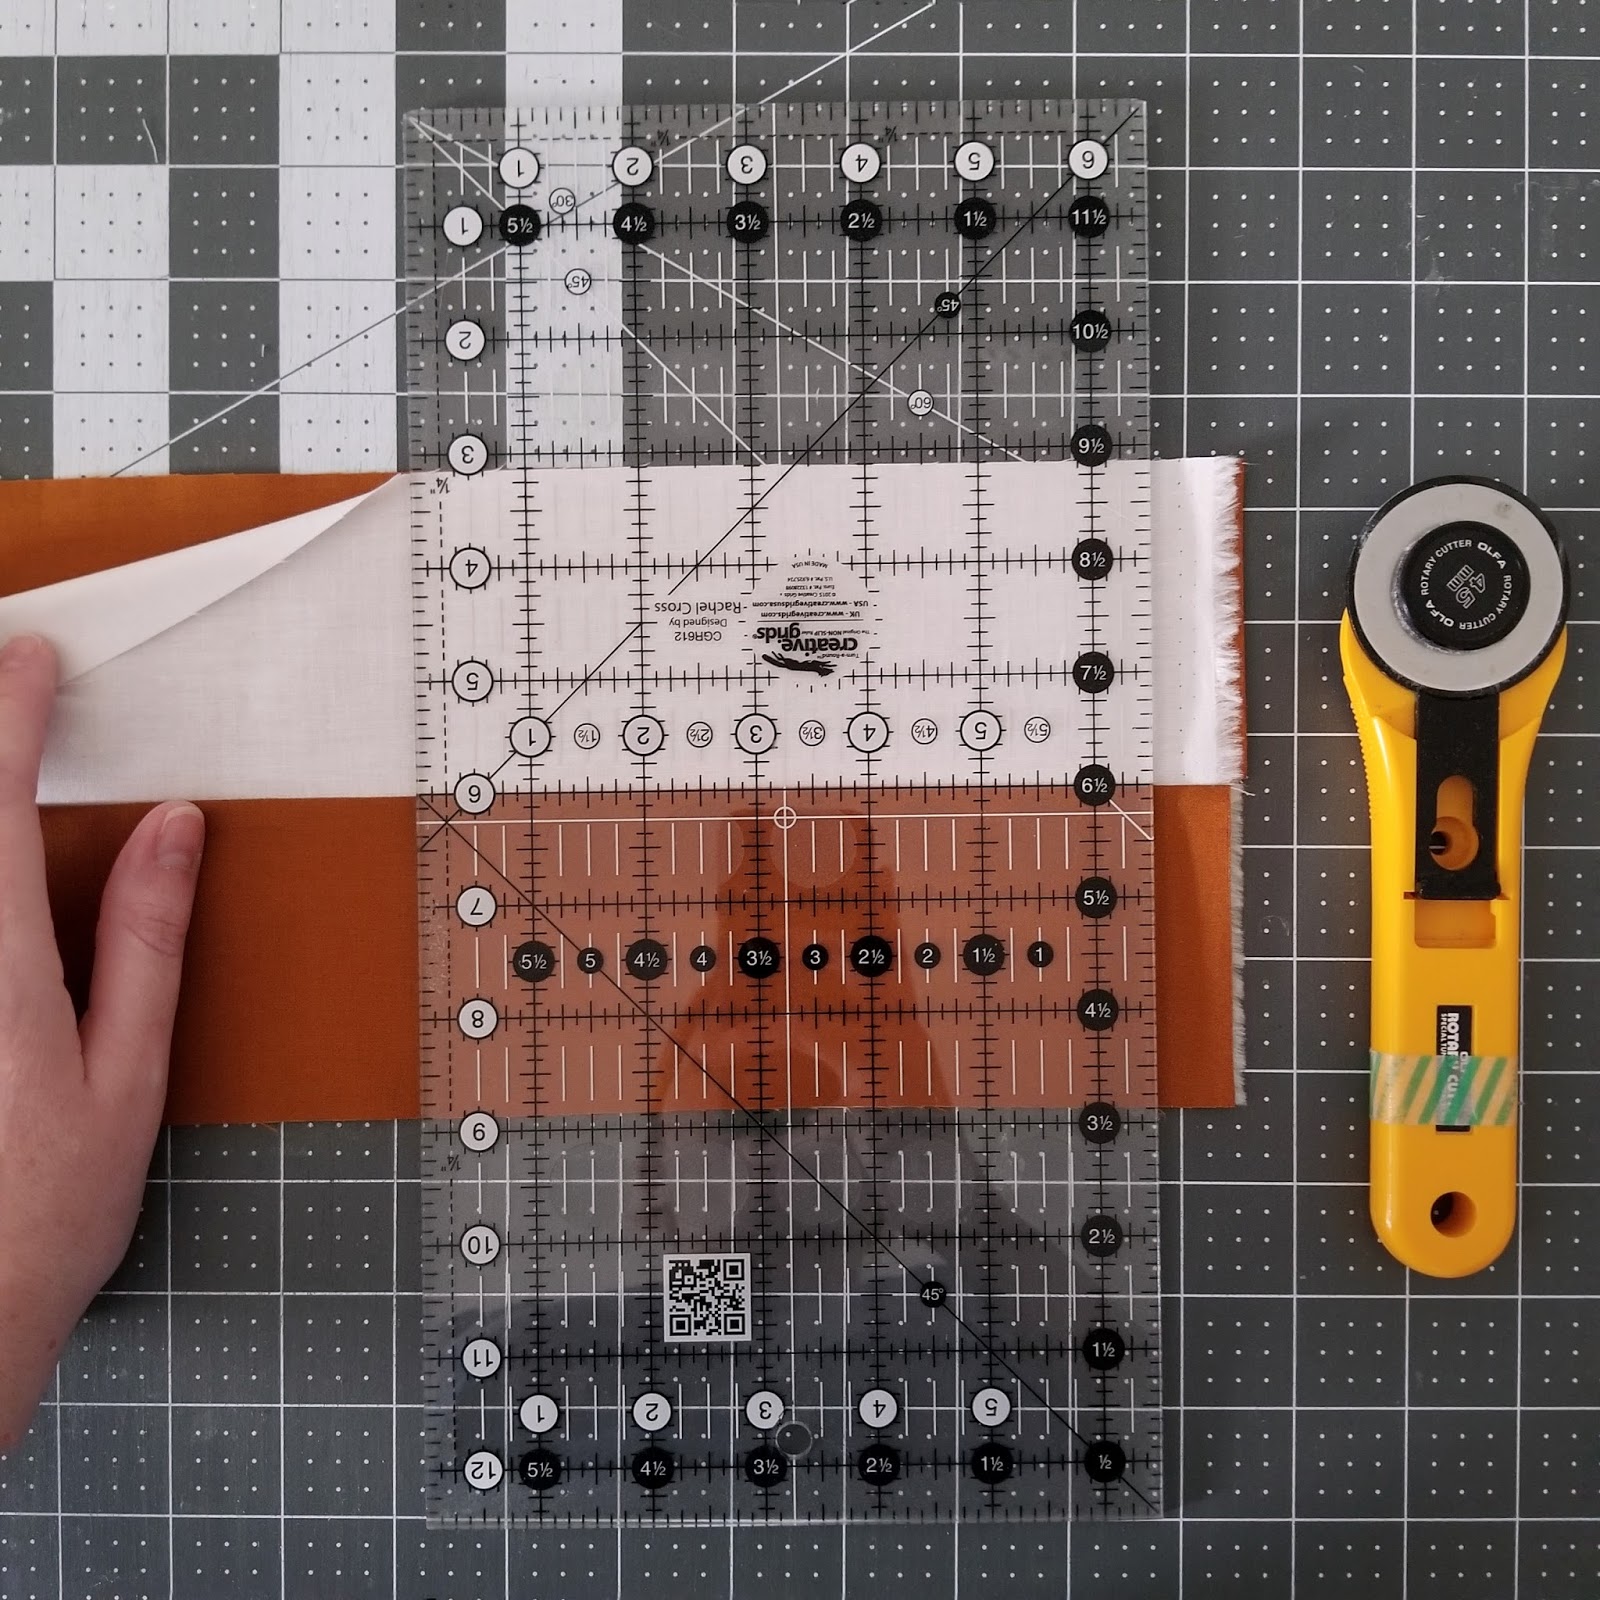
After you've sewn the rows together you will need to square the quilt top by trimming 1/4" away from the outermost points around the perimeter. I do this by simply lining up the 1/4" marking on my ruler with the points on the quilt. Also, in example photo below, you will want to line up one of the horizontal markings with the horizontal edge of the corner. This ensures that your corner will be square or a 90° angle later.


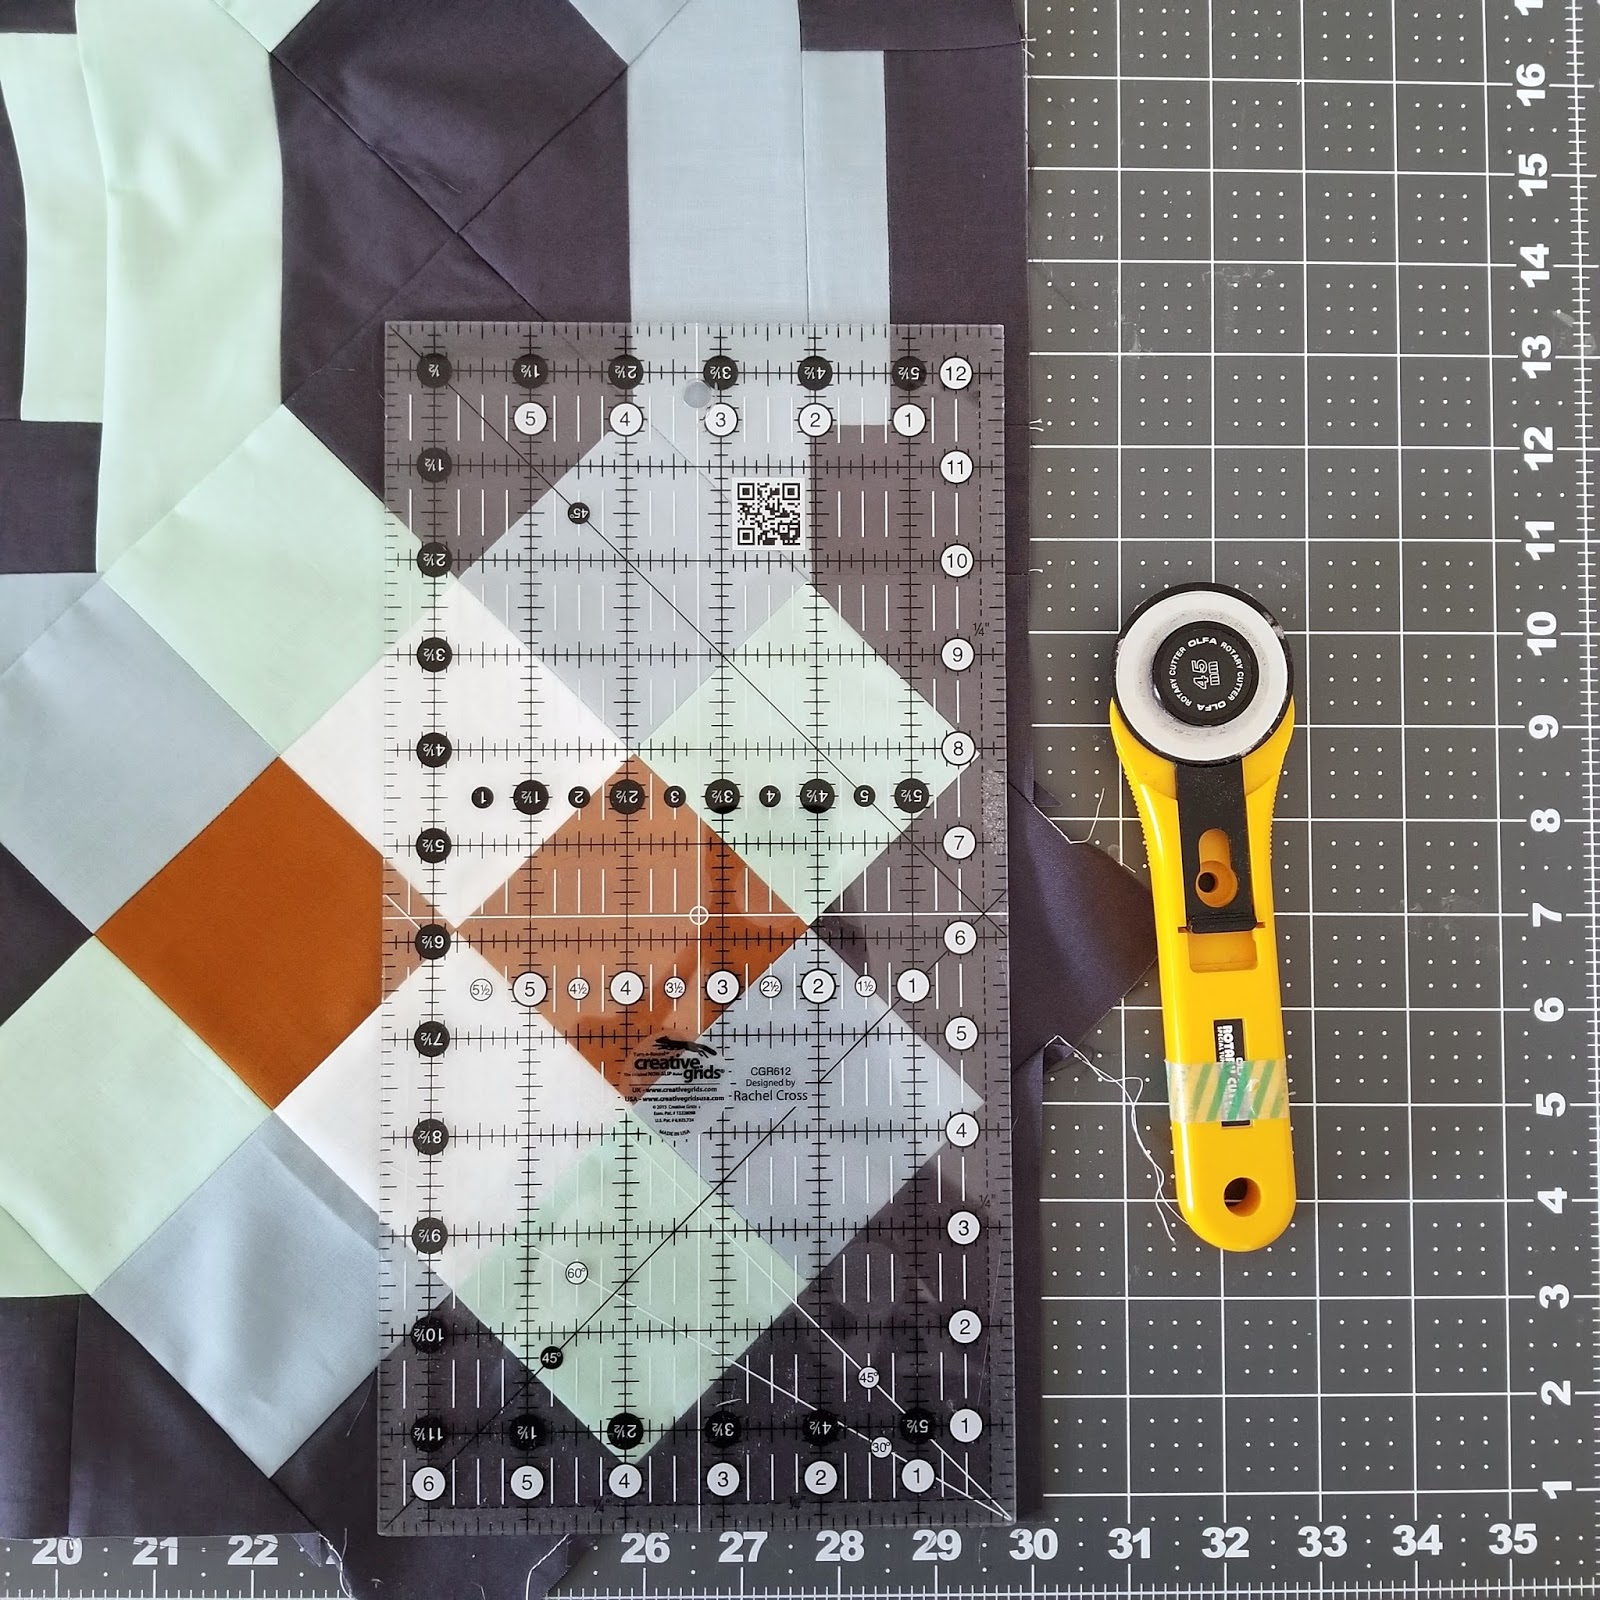
I like to trim right up to the second point, move my ruler up so now I'm measuring 1/4" past the next point while making sure the ruler lines up with the previous point I just trimmed.


I keep moving my ruler along all four edges, measuring from point to point, until the entire quilt is trimmed. Add your borders as instructed in the pattern and your top is finished! 🙌

I hope you all found these tips for making the Vegas Wedding quilt helpful! Like always, email me at PenAndPaperPatterns@gmail.com or comment below with any questions! And use the hashtag #VegasWeddingQuilt when you share your progress on social media! I'd love to see how your quilts turn out!

Thanks!
Lindsey

Saturday, January 20, 2018

Vegas Wedding Quilt Tips & Tricks - Part 3

I had an Instagram follower message me the other day asking for my opinion on a color scheme she was considering for her Vegas Wedding quilt. Because I am a dork, instead of just responding with "I love it!" (cause I really, really did!) I sent her six different versions of the quilt using the colors from her color scheme...I shared my dorky ways on IG stories which then led to requests for more color scheme suggestions for the Vegas Wedding quilt....so here you go!

I draw a lot of my color inspiration from images I see online, but another great resource that I always forget about is Design Seed! It's a treasure trove of gorgeous color palettes that you can draw a ton of inspiration from! You can also find four different color scheme suggestions on Page 9 in the Vegas Wedding pattern, but, if none of those catch your fancy, check out the suggestions below! 

So grab your Kona/Cotton Couture/<fill in the blank favorite solids manufacturer> swatch cards and start matching! 💃


Alright, let's start making Block Three! (Vegas Wedding Quilt Pattern is available HERE)

Block Three has a lot of similarities in construction to Block Two, so I won't get into as much detail as the previous post (You can view that post HERE) But, here are some additional tips I find helpful while making it!

After sewing the L pieces to the H/O/N and E/O/N units (H/O/N and E/O/N refers to the letters assigned to the cut pieces in the pattern), I like to trim my dog ears BEFORE pressing. With the wrong side of the unit facing up, I follow the raw edge of the unit with my scissors while trimming the dog ear. I then press the seams toward Piece L.


An example of what those units look like after they've been pressed is below.


This was already mentioned in the pattern, but I feel it is important to really emphasis how helpful it is to finger press the center of your Block Two template units and H/O/N and E/O/N units. Line up those center creases and pin or glue in place.


Following the tips I suggested in the second part of this series, make sure the edges of your Block Two template unit and H/O/N or E/O/N units intersect by 1/4". I've done enough of these type of units where I can pretty much just eyeball the 1/4" now, but if this is a new technique for you or you don't feel super confident about it, I recommend following the tips I suggest in the second post - where you mark the 1/4" seam allowance on your unit OR take a small ruler, after you've pinned the units together, and measure the 1/4" seam allowance to make sure it is intersecting between those two points (example pic below) before you sew them together. If it isn't intersecting perfectly, then adjust the units as necessary.


You might have some units where you have to adjust the units so much that you have some gapping after you've pinned them together. As long as the excess fabric that is causing the gapping is less than 1/4" in total, you can get rid of it by sewing your units with the gapping side face down on your sewing machine. I'm not sure the exact science behind it, but your feed dogs will work their magic and distribute that excess fabric evenly so you have no puckers or a lot of distortion in your block later on.


I'm not sure why it appears like my gapping issue is on top...It really is the bottom piece that
is face down on my sewing machine. I promise!


And here are all of my blocks laid out and ready to be assembled into a top! I have a fun tip I'm excited to share next week for matching up those angled seams! Stay tuned!

In the meantime, feel free to email me or comment below with any questions you might have about the pattern! Happy to answer them 😊

Tuesday, January 16, 2018

Vegas Wedding Quilt Tips & Tricks - Part 2

Before I get started with this week's post, I have to share some photos from my talented and oh-so-helpful Vegas Wedding quilt testers!

First up are photos of my mom's (@gailzerbe on Instagram) fun & vibrant Vegas Wedding quilt! Love, love, love her floral background! 😍 I'm not biased or anything, right?? 😉


Next is my friend, Meghan of Then Came June! The colors she chose are so dreamy and a perfect fit for this quilt!


And last but not least is Joanne's finished Vegas Wedding quilt top! Joanne did a beautiful job and was such a big help in getting this pattern perfected for you all!


In this week's post, I will be breaking down the second step of Block Two in a lot more detail! Block Two a little trickier to make than Block One, but if you follow the instructions in the pattern exactly and use the tips I share here, then it should come together pretty quickly!

The most difficult part of this block is sewing Piece K and the Block Two template piece together. It is SUPER important that the seam allowance intersects where the two edges of these pieces meet. If it doesn't then the two angled edges of this unit will be jagged instead of smooth and straight. Example of how this unit should look when it's finished below....


If you find these type of units difficult to make or haven't made one before, then I recommend utilizing the tips below to make it go as smoothly as possible...

Using a small ruler, make two tiny marks (within the seam allowance) that are 1/4" away from the top edge of the Block Two template piece with the right side facing up (Do this in conjunction with making a center crease as suggested in the pattern).


Now, layer Piece K and the Block Two template piece right sides together and using pins or glue (more about glue basting below), align the two pieces together so that two angled edges of Piece K intersects with the pencil markings on the Block Two template piece. Also make sure to line up the center crease. Pin or glue those edges in place.


If you are having issues with the seam allowance intersecting between those two points even after following the steps above, I recommend using some washable glue (I use Elmer's with a glue tip from Pile O' Fabric) to hold those two pieces in place. The glue helps to prevent ANY shifting while you sew. And you don't need a ton of glue to hold them together either. I like to place three small dots, exactly where I would have pinned the pieces together, and then either let the unit air dry as I glue the remaining sets together or heat set it with a dry (aka no steam), hot iron.


Since Piece K has a bias edge, you can also manipulate it slightly to making it larger or smaller so it fits with the Block Two template piece perfectly. Don't worry if you need to stretch Piece K slightly or vice versa to make it work! This will not effect the outcome of your block later on.


If your background fabric is darker than your ring fabrics, like in my sample above, you will want to press your seam allowance toward the background fabric for this unit and NOT piece K. You will need to trim the dog ears (pictured in the bottom unit of the photo below) on this unit before sewing the rest of the block together.


Follow the remaining instructions in the pattern to complete this block.

I hope these tips help while making Block Two! If you have any questions while making it, please email me at PenAndPaperPatterns@gmail.com! I'm happy to help!

Next week I will be sharing tips for making Block Three - which should be easy after you've mastered Block Two :) See ya next week!


Sunday, January 7, 2018

Vegas Wedding Quilt Tips & Tricks - Part 1

Are you ready to start making your Vegas Wedding Quilt??

Vegas Wedding Quilt pattern can be found HERE

** Before I start sharing some of the ways to make this quilt go a little smoother, make sure you either have your pattern printed out in color or viewable from a device nearby. To avoid potential confusion later, I do not recommend working from this pattern when it's been printed in black & white.

** Make sure you have the template on Page 7 printed at actual size or "Do Not Scale". Measure the 1" square on that page to double check it's been printed correctly. If it's even a hair smaller than your ruler, then you most likely will need to try printing the template again.

** Also, it's important to utilize the cutting labels on Page 8. And I know what you're thinking..."Do I REALLY need them??" Yes, yes you do (sorry, I'm a party pooper). I know it can seem like a hassle or a waste of time, but I really believe staying organized while making this pattern will ensure a less frustrating experience later.

** One last thing before we get started, I also recommend starching your fabric BEFORE you start cutting. Because this pattern works with bias edges, it is important to give your fabric as much body or structure as you can to avoid distortion later from cutting, sewing, pressing, etc. I like to make my own starch spray when pressing and the recipe I use for that is 1 part vodka (I buy whatever is cheapest) to 3 parts water. Vodka is made from fermented potatoes or corn so that is the starch component of this spray. It works just as well as Best Press or any other starch sprays I've used and so much less expensive too!

In this blog post, I will be covering tips for cutting & organizing your fabric and tips for making Block One....here we go!

Take your time, follow the cutting instructions on Page 1 and cut out and label all the necessary pieces. I sometimes find it helpful to bag the pieces together with the corresponding label to avoid anything getting mixed up later. If you are coming to my Vegas Wedding class on the 20th, then I HIGHLY recommend bagging all of your cut pieces separately before class.


Block One in this pattern is just a simple patchwork block and very easy to make.

I use the strip set technique to assemble Block One. I do not use pins when sewing my strips together, but I do pay extra attention to my edges staying aligned while sewing and I'm also careful not to pull on the top or bottom strip more than the other while feeding them through my machine.


Be gentle when pressing strip sets. It can be easy to distort the strip set by moving the iron around too much or too hard on the seam.


To speed up the cutting process, I like to layer two strip sets on top of each other and cut them at the same time. It's even easier to do this when your strip set seam has been pressed to one side. You can layer them so the seams nest together by flipping one of the strip sets in the opposite direction so that it is a mirror image of the strip set below it. Make sure your edges are lined up while cutting.


Also, you might need to square up the short edge of the strips after 3-4 pieces have been cut as shown in the photo below. Trim off as little as possible to avoid coming up short at the end.


This is the most the complicated part of this block and that's just making sure you pay attention to the orientation of the diamond/center block in relation to your ring prints. What I like to do to prevent any mistakes is to divide each pile of the various components for Block One in half as shown below.


It is important that your center diamond block keeps the same orientation for all 16 Block One's and that the ring pieces are a mirror image of each other for each set of eight blocks. Make sure the ring prints that are catty-corner to each other are not the same color. For example in the block below, the mint print is never next to another mint print. Notice that the ring prints follow an AB pattern around the perimeter of the block too. 


I like to sew all of the first set of Block Ones at the same time and then move on to the second set. It helps to avoid any confusion about the placement of the ring prints later.


And here are my two sets of eight Block Ones all together below!


I hope this post helps! If you have any questions, feel free to ask below or email me at PenAndPaperPatterns@gmail.com. Next week I will be going over how to construct Block Two in more detail! Lots of good tips for this one! If you're sewing along, get those pieces and the Block Two template ready-to-go!

💗 Lindsey